
Bioactive Blueprint


Lets build and learn about bioactives
A bioactive vivarium, is an enclosed ecological system, that houses animals, plants, and other organisms to create a self-sustaining ecosystem. The term "bioactive" refers to a substance that has a biological effect. In a bioactive terrarium, everything helps maintain a natural balance and promote the health of your spood.
Through the addition of some key bioactive elements, the terrarium will do the dirty work of cleaning and restoring itself.
As you might expect, there are various factors involved in a successful bioactive ecosystem. But on a practical level, it’s mostly a one-time setup, and low maintenance.
Step 1
.jpg)
Remove Film and doors
Before beginning your bioactive build, prepare the enclosure properly. A suitable bioactive enclosure should have a deep base, ideally around 3 inches below the door line, to accommodate a drainage layer and hold moisture without leaking.
Most new acrylic enclosures arrive with protective film on all panels. Carefully peel away the film using your fingernails or a soft plastic tool to avoid scratching the surface. Remove film from both interior and exterior panels.
Detach all doors before starting your build. Working with an open frame makes layering substrate and décor significantly easier and reduces the risk of damaging hinges or tracks.
Rinse the enclosure thoroughly with lukewarm water to remove dust or manufacturing residue. Do not use soaps or chemical cleaners. Dry completely using a clean microfiber cloth before moving to the next step.
Proper preparation ensures a clean foundation for your bioactive system and helps prevent long-term issues with mold, residue, or trapped debris.
Step 2
Drainage layer
A proper drainage layer is essential for a successful bioactive enclosure. Add approximately ½ inch of drainage media to the base. Suitable options include LECA (lightweight expanded clay aggregate), chunky #4 perlite, or volcanic rock.
This layer prevents the substrate above from sitting in stagnant water. By allowing excess moisture to collect below the soil line, it reduces the risk of mold, root rot, and anaerobic conditions that can harm your clean-up crew.
The drainage layer creates a moisture reservoir while keeping the soil aerated. This balance supports plant health, microbial activity, and long-term enclosure stability.
Skipping this step often leads to oversaturation and system failure. A well-built drainage foundation sets your bioactive enclosure up for long-term success.
.jpg)
Step 3
.jpg)
Drainage Shield
A drainage shield creates a physical barrier between the drainage layer and the bioactive substrate. This prevents soil from settling into the drainage media while still allowing water to pass through.
Our drainage shield is specifically designed to fit our enclosures for a clean, secure separation layer. If you are not using our custom shield, a piece of weed barrier fabric can be used as an alternative.
Cut the barrier to fit the enclosure base and extend it slightly up the sides. This ensures the substrate remains fully separated from the drainage layer and prevents mixing over time.
A proper separation layer preserves airflow below the soil, maintains water flow, and supports long-term bioactive stability.
Step 4
Substrate mix
Your substrate mix is the foundation of a successful bioactive enclosure. A properly formulated bioactive mix supports plant growth, microbial activity, and the long-term health of your clean-up crew.
A quality mix should retain moisture while still draining efficiently. It should contain a blend of organic materials such as coco fiber, compost, hardwood leaf litter, decaying oak, and horticultural charcoal. Inoculation with beneficial microbes and mycorrhizal fungi further strengthens root systems and promotes natural nutrient cycling.
A diverse substrate creates structure, aeration, and long term stability within the enclosure. Avoid compact, single-ingredient soils that can become waterlogged or anaerobic.
Before adding substrate to your enclosure, always rehydrate thoroughly. Most commercial mixes are sold dry and can be hydrophobic straight from the bag. Slowly add distilled or dechlorinated water while mixing until the substrate is evenly moist but not muddy.
A well-prepared substrate layer sets the stage for a thriving, self sustaining bioactive system.
.jpg)
.jpg)
Step 5
Plants, Hardscape and Botanicals
Now it’s time to build your environment.
Select terrarium safe plants that have been thoroughly cleaned of pests and excess nursery soil. Gently remove as much original soil as possible and plant directly into your bioactive substrate to prevent introducing unwanted insects or fertilizers.
Add hardscape elements such as cork bark, driftwood, or branches to create vertical structure and anchor points for webbing. Ensure all pieces are stable and firmly secured so they cannot shift or collapse.
Layer in dried botanicals such as leaf litter, seed pods, or bark pieces. These provide cover, humidity pockets, and long term food sources for your clean up crew. Only use botanicals that are pesticide-free and aquarium safe.
When positioning décor inside acrylic enclosures, avoid metal tools that can scratch the surface. Use plastic tools or your hands to adjust layout safely.
A thoughtfully arranged enclosure supports natural behavior while maintaining stability and airflow.
Step 6
Leaf litter
Apply a generous layer of leaf litter across the surface of the substrate. Leaf litter creates essential microhabitats for your clean-up crew, supporting reproduction, humidity balance, and long-term ecosystem stability.
Only use leaves collected from unsprayed, pesticide-free areas. Before adding to your enclosure, sanitize by either boiling for 10–15 minutes or baking at 200°F for 30–45 minutes. Allow leaves to cool and dry completely before use.
Safe leaf litter options include:
• Oak
• Magnolia
• Beech
• Maple
• Sea grape
• Guava
• Indian almond
Using a variety of leaf types provides diverse nutrition and structure for isopods and springtails.
Avoid resinous or toxic woods and leaves.
Do NOT use pine, walnut, cedar, fir, or eucalyptus.
A thick, natural leaf layer mimics forest floor conditions and transforms your enclosure from planted soil into a functioning ecosystem.
.jpg)
Step 7
Decor and Accessories
.jpg)
Adding decor and accessories provides enrichment and security for your spider. Shelves, ledges, cork hides, and anchor points allow natural climbing, webbing, and resting behavior.
New acrylic enclosures are smooth and can be difficult for spiders to grip. Structured decor gives traction, vertical exploration space, and secure areas to retreat. A well-designed layout helps your spider feel stable and confident in its environment.
All decor and accessories should be installed before introducing your spider. Secure every piece firmly so nothing shifts, tips, or rocks when opening doors or handling the enclosure.
Before adding your spider, gently test stability. You should be able to move or lightly shake the enclosure without anything falling or shifting.
A secure environment prevents injury and supports natural behavior from day one.
Add Clean up Crew
Step 8
Your enclosure should be fully assembled and stable before introducing any living organisms. Temperature, humidity, and ventilation should already be within appropriate ranges for your clean-up crew.
The substrate should be evenly moist but never saturated. If water pools or the soil feels muddy, allow it to balance before proceeding.
Gently place springtails and isopods onto the substrate surface or beneath cork bark and leaf litter. Allow them to disperse naturally without excessive handling.
Avoid sudden environmental changes during introduction, as stress can impact colony establishment. Once added, leave the enclosure undisturbed for several days so the clean-up crew can acclimate, locate shelter, and begin establishing their population.
When the microfauna are active and stable, your bioactive system is officially alive.
.jpg)
Step 9
Cycle and Introduce Your Spider

Before adding your spider, allow the enclosure to cycle. This gives plants time to root, beneficial microbes to establish, and the clean-up crew to begin reproducing and stabilizing the ecosystem.
A cycling period of 1–2 weeks is recommended. During this time, monitor moisture levels, ventilation, and temperature. The substrate should remain evenly moist but not waterlogged. Minor fungal blooms are normal in new bioactive systems and typically resolve as springtails and isopods establish.
Avoid overwatering during this period. Let the system balance naturally.
Once the enclosure shows signs of stability active clean up crew, rooted plants, no standing water, and consistent environmental conditions your spider can be introduced.
Place your spider gently into its new habitat and allow it to explore without disturbance. Avoid handling or rearranging decor during the first several days.
A properly cycled bioactive enclosure provides long-term stability, natural enrichment, and a healthier environment for your spider.
Plant recommendations
Terrarium plants should have small leaves and compact growth even as the plant matures. They should thrive well in a humid environment and thrive in lower lighting.
Acquiring plants from good sources that do not use fungicide or pesticide. If you can not find a source for pesticide/fungizide free plants, repot plants in organic safe soil and quarantine plants for 3 months before use. Remove soil and wash thoroughly with water before planting in bioactive.
.jpg)
.jpg)
.jpg)
.jpg)
.jpg)
.jpg)
.jpg)
.jpg)
Clean up Crew
is the living foundation of a healthy bioactive enclosure. made up of springtails, isopods, and beneficial mycorrhizal fungus, this micro ecosystem works together to naturally recycle waste support plant health and maintain long term enclosure balance
.jpg)
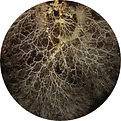
Mychoriza Fungus
form a beneficial relation with plant roots, improving nutrient uptake, strengthening root system and supporting overall soil health. May need to be readded if enclosure dried out.
_edited.jpg)
Springtails
Feed on mold, fungus, and decaying organic matter, helping prevent outbreaks while keeping substrate fresh.

Isopods
break down leaf litter, shed exoskeleton, and waste into a nutrient material that plants can use. While not essential for your spiders clean up crew. Only add Isopods after spiders mature molt.
Non aggressive, dwarf or small species recommended
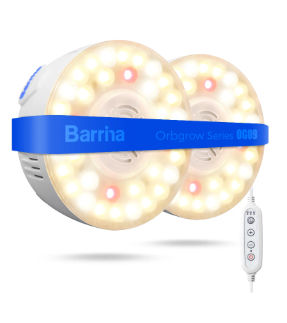
BioActive Grow lights
Bioactives will not thrive without proper lighting, LED Color Temperature around 5000K-6500K (cool white/daylight). Some grow lights come with timers to control and maintain a consistent schedule, or you can find an outlet timer at most hardware stores. Light should be 6 inches away from enclosure to avoid burning or warping
* Not sponsored

.jpg)
Bio Bloom
Bio Bloom is a normal fungal phase in newly established bioactive enclosures.
Bio bloom commonly appears during the first few weeks of a bioactive setup. It is caused by excess nutrients and fresh organic materials breaking down. While it can look alarming, it is usually temporary and part of the natural cycling process.
.jpg)
What Bio Bloom Looks Like
Bio bloom often appears as white, fuzzy, web-like fungal growth on substrate, wood, or leaf litter. It commonly develops when fresh organic material and moisture combine in a newly built enclosure.
.jpg)
Why It Happens
In early setups, excess nutrients and limited airflow allow fungi to establish quickly. As springtails and isopods reproduce, they begin consuming fungal growth and restoring balance naturally.
.jpg)
How to Manage It
Management focuses on balance, not elimination.
• Improve ventilation
• Avoid overwatering
• Allow the clean-up crew to establish
• Remove only excessive patches if needed
Bio Bloom is Temporary
In most cases, fungal blooms fade within 1–3 weeks as the ecosystem stabilizes. Patience is part of the process.
When to Worry: Harmful Fungal Growth
Not all fungal growth is beneficial. While white, light, web-like bio bloom is typically harmless and temporary, certain signs indicate imbalance or unhealthy conditions
Signs of Problematic Fungus:
• Thick, dense mold that spreads rapidly across large areas
• Green, black, or dark gray fuzzy growth
• Persistent sour or rotting odor
• Slimy or wet patches on substrate
• Visible die-off of springtails or isopods
These signs usually point to excessive moisture, poor ventilation, decaying organic matter buildup, or insufficient clean-up crew populations.
What Causes Harmful Mold?
• Overwatering or saturated substrate
• Stagnant air and limited airflow
• Large amounts of uneaten food or decaying material
• A newly established enclosure without enough microfauna
• Lack of drainage layer separation
Bioactive systems rely on balance. When moisture and nutrients outweigh airflow and clean-up crew activity, opportunistic mold can take over.
How to Correct It:
If you notice problematic fungal growth:
• Remove heavily affected organic material
• Increase ventilation immediately
• Allow the substrate to partially dry
• Add additional springtails
• Reduce watering frequency
In most cases, adjustments restore balance quickly.
When It Becomes Dangerous
If mold persists despite corrections, spreads aggressively, smells foul, or your clean-up crew crashes entirely, the enclosure may need partial substrate replacement or a full reset.
Trust your senses. A healthy bioactive enclosure should smell earthy and fresh, not sour or stagnant.
Ongoing Maintenance
.jpg)
Support clean up crew
Occasionally supplement clean up crew with appropriate foods if natural debris is limited
.jpg)
Water
Water when the condensation on the enclosure in the substrate substrate layers, starts disappearing. Avoid over watering. the drainage level of water should never get more than half way full..
.jpg)
Trim plants
Plants grow and that's a great thing. Minor trimming to keep space open for your spider to explore.
.jpg)
Fertilize
Every 6 months fertilize substrate with worm castings to helps plant growth.
.jpg)
leaf litter levels
replace leaf litter as necessary there should always be a layer on top of substrate
.jpg)
Spot clean
Spot cleaning the sides of the enclosure with microfiber cloth and picking up uneaten waste that the clean up crew can not clean up before it molds
Suggested Accessories for Spider
our picks of necessary accessories to keep your spider happy in your bioactive
.jpg)
Hygrometer/ Thermometer
provides accurate, easy to read monitoring of humidity and temperatures inside of enclosure. Maintain proper environment conditions is essential for the health of your invertebrate and plants
.jpg)
Feeding Dish
provides a clean, designated area for offering food inside of your enclosure, Keeping feeder insects from burrowing down into the substrate
.jpg)
Web lace
provides extra texture and vertical surfaces inside of enclosure encouraging natural climbing and exploring behaviors. It creates a secure grip points making the enclosure more enriching and functional
.jpg)
Clean up Crew Feeding Dish
These 3D printer isopod feeding dishes are designed to keep food of the substrate, reduce mold, and make colony maintence easier with out disrupting tyour bioactive set up

Weird is Beautiful™ Complete Terrarium & Invertebrate Care Kit
provides a clean, designated area for offering food inside of your enclosure, Keeping feeder insects from burrowing down into the substrate

Mineral Block
designed to support isopods, springtails, and other clean-up crew in bioactive enclosures. Each block is made using a custom-balanced recipe developed to remain firm, resist crumbling, and hold up during shipping and humid enclosure conditions.